How do I connect my A920 Pro payment terminal correctly?
Learn step-by-step how to connect your device correctly to ensure smooth, secure transactions.
Getting to know your payment terminal
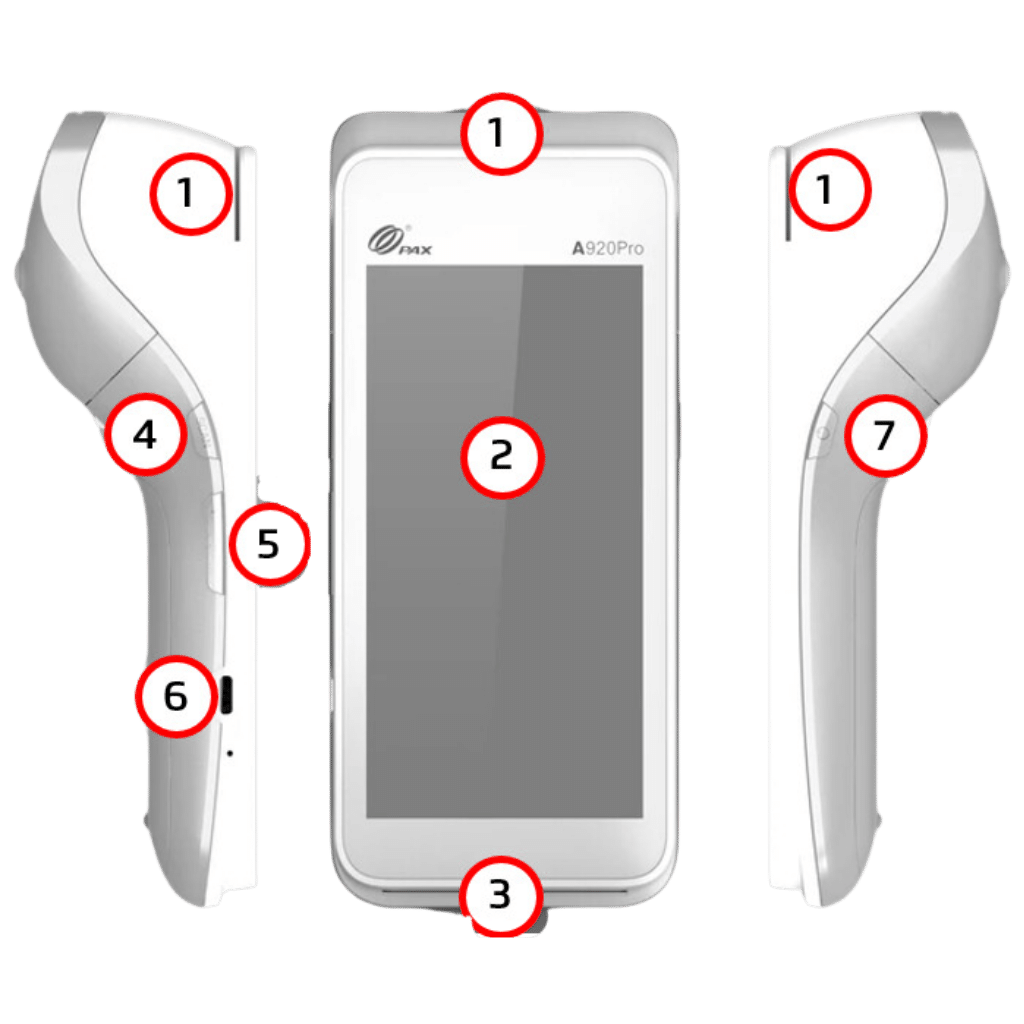
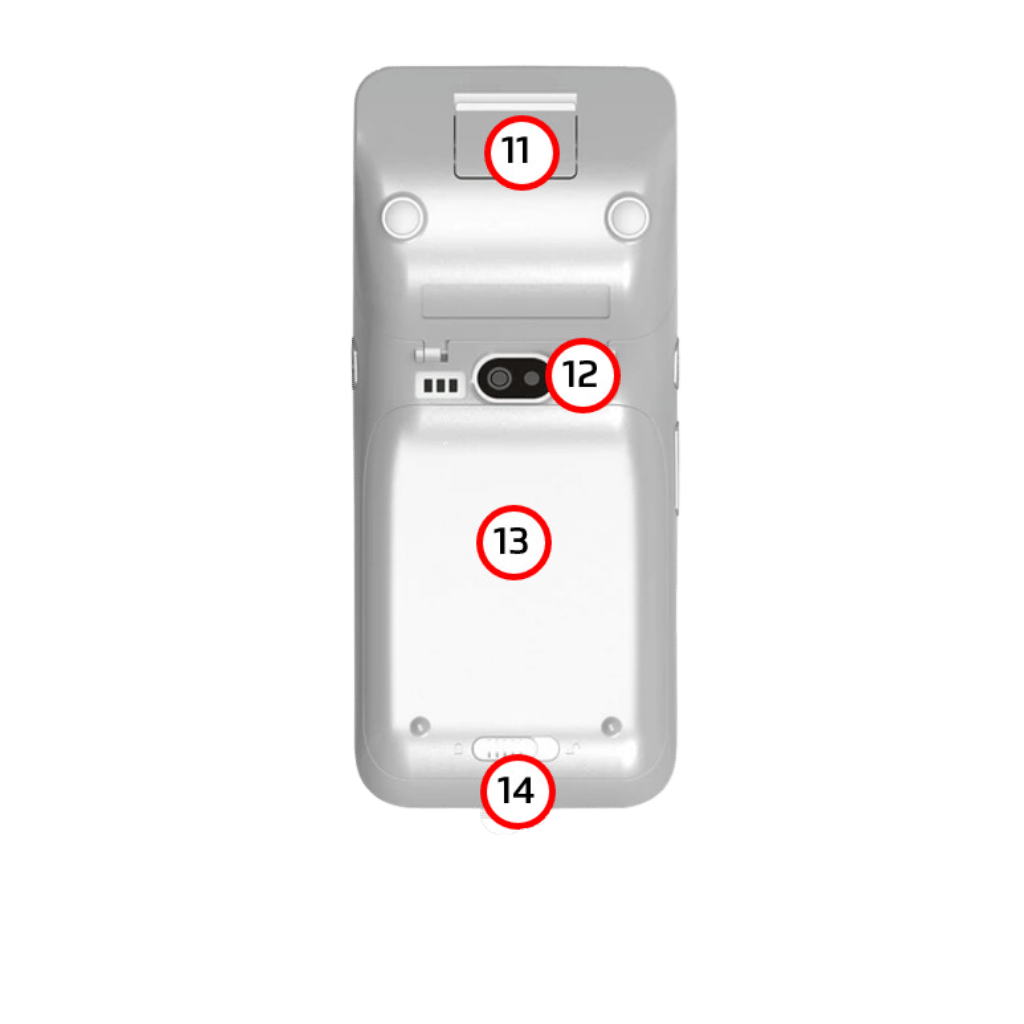
The following illustrations show the location of the terminal's main features and devices.
1- Tape drive
2- Color touch screen
3- Smart card reader
4- Scanner button
5- Volume control knob
6- USB charging port
7- Power button
8- Scanner
9- Contactless card reader
10- Printer
11- Printer lever
12- Rear camera
13- Battery cover
14- Lid catch

Connecting your payment terminal
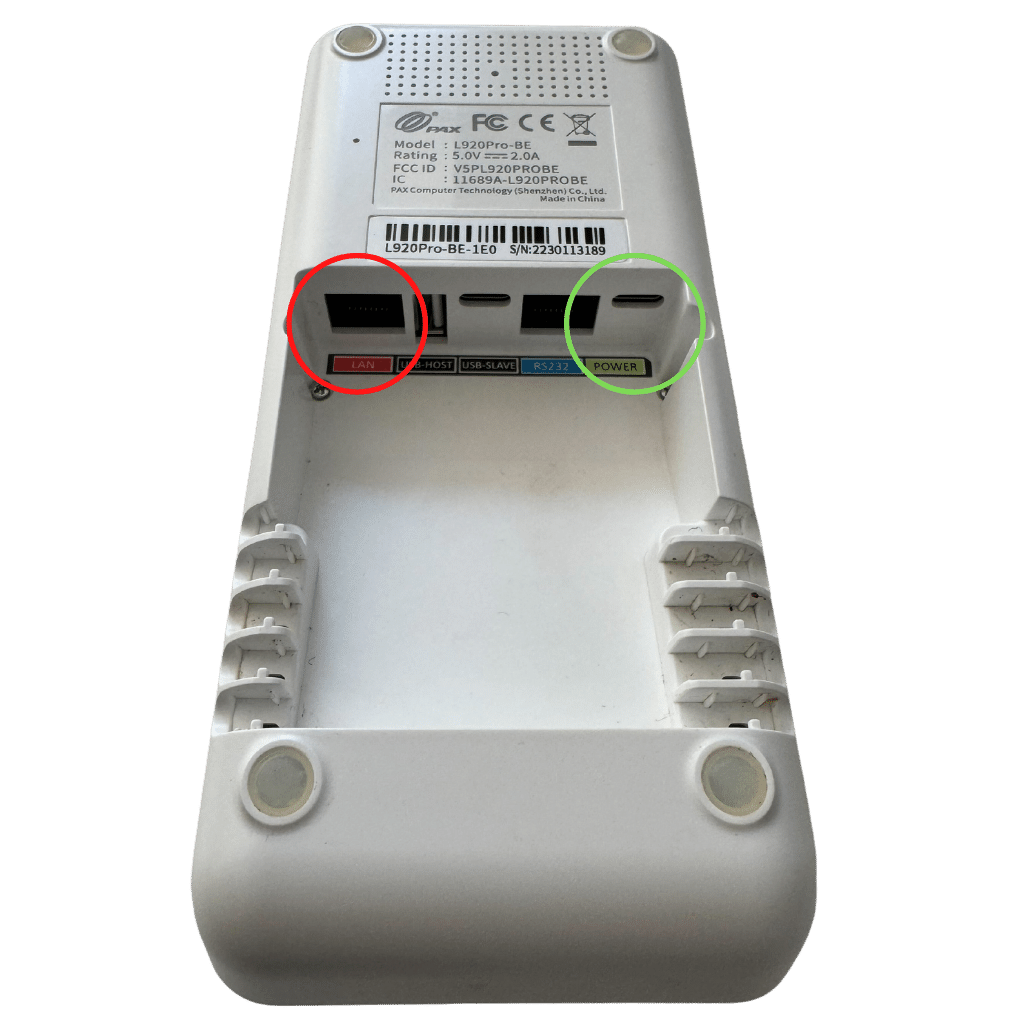
1) Take the base in your hand and turn it over.
2) Connect the Ethernet cable to the red-framed "LAN" port (if selected).
3) Plug the charger into the green-framed "POWER" port.
4) Turn the base over and place it on your stand.
5) Connect the Ethernet port to an Ethernet socket (if option selected).
6) Plug the charger into an electrical outlet.
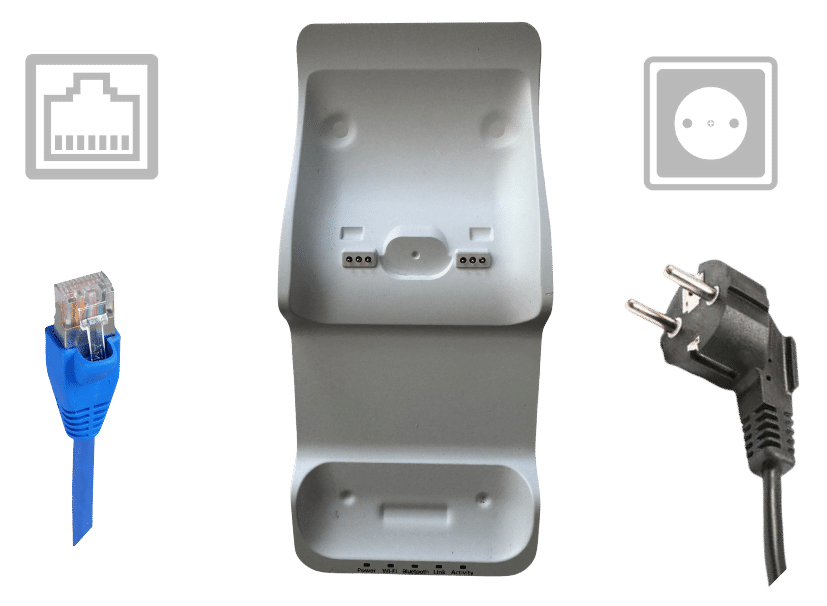
7) Place the terminal on its base.
8) Switch on your terminal by pressing and holding the button on the right-hand side. The terminal lights up.
.png)
9) When your tpe is switched on, your applications appear on your home page:

WIFI or Ethernet connection
WIFI connection
If you have opted for a WIFI connection :
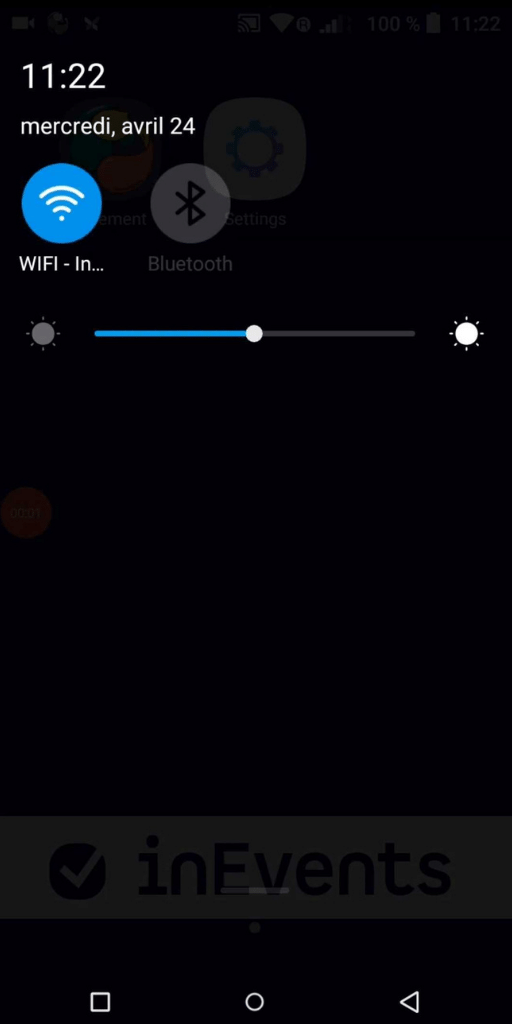
1) To bring up the WIFI icon, slide your finger from the top of the screen to the bottom, click and hold on the WIFI icon to open its menu:
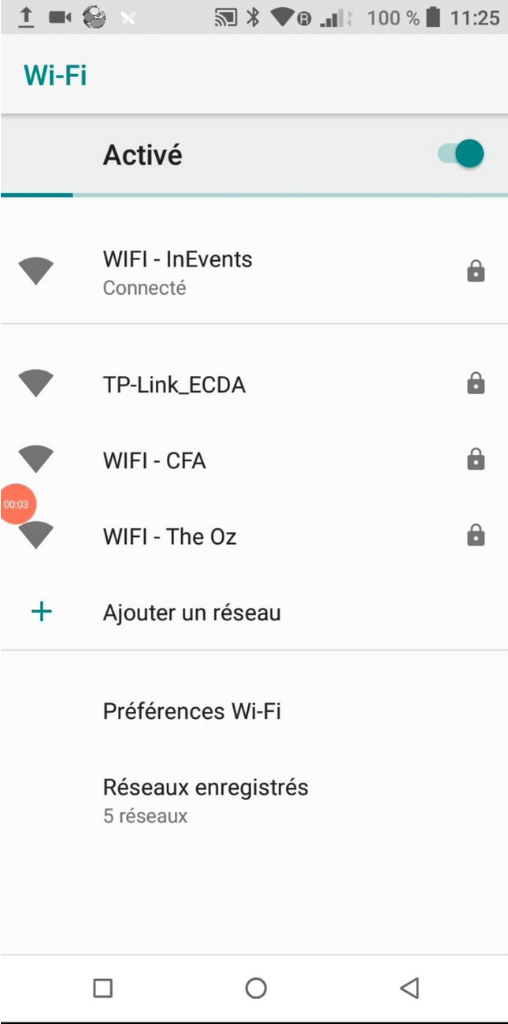
2) Find your WIFI connection point
Ethernet connection
You have previously connected the cable to the LAN port.
The aim is to connect the terminal to the base. This connection is made via WIFI.
Keep your finger on the WIFI icon in the top left-hand corner, and a list will appear.
You must then select the correct number for your base:
- This is on the back: S/N: XXXXXXXXXX (10 digits).
- Password: [L9202018]!
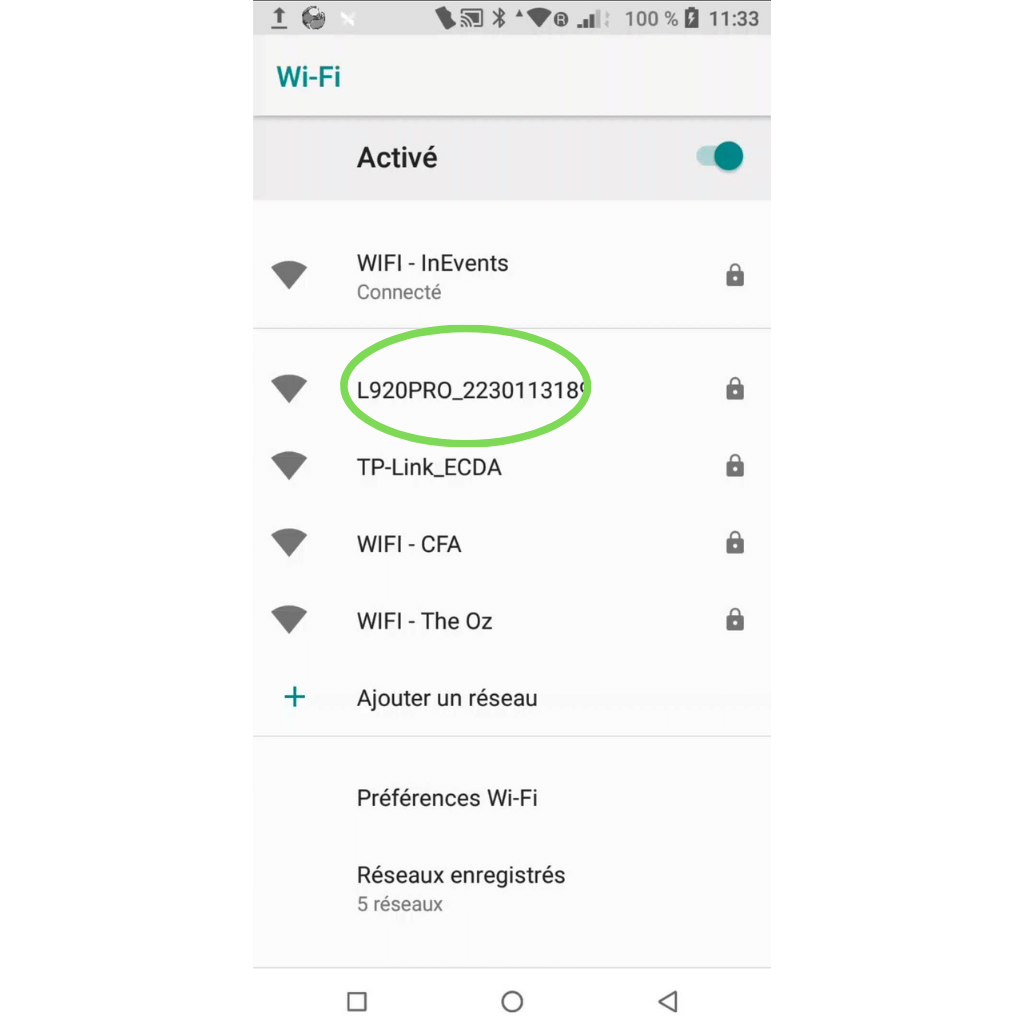
The base is wired and the TPE is connected to its base by WIFI.
If you need any further information or assistance, please don't hesitate to contact us!

